
ReadyCloud API v2
The ReadyCloud API provides read and write access to orders, boxes, items, addresses and all the other major data stored and processed by ReadyCloud. It is a modern JSON based RESTful API.
Version 2.0 of the API is a major upgrade which provides many new properties and features, while at the same time simplifying and improving the format. Field naming is better, fewer fields are ‘custom fields’ but instead fully formatted and documented properties and we have a new way to distinguish explicit and implicit data.
This documentation is a full reference to the API, and also contains a guide to setting up a simple API client.
Pre-Authorization Steps
Authentication is the same for ReadyCloud API v1 and v2.
Getting a Client ID
A client id is needed to authorize your application with the ReadyCloud API. Please follow the steps below in order to obtain one.
Go here and create an app. Name it whatever you like, but make sure it relates to the organization that you will be authorizing with. For example, if an organiztaion was named “BurgerMaker”, “BurgerMaker App” might be a suitable name.
Once the App is created, click the Edit button and copy the App ID
value, this is the client_id.
Creating a URL
The next step is to create a URL that your application will use to get an API key from ReadyCloud.
The base URL is this: https://www.readycloud.com/api/v1/oauth2/authorize
And it accepts the following GET query string parameters:
response_type: MUST be set to “token”. This argument is required.scope: Space separated permissions to API resources that your application is requesting to access from the RC account user. If omitted, all scopes below will be requested (not recommended). You can ask for full or read only access.client_id: This is the client id that we got from the Getting a Client ID section above.
An example of a complete URL is the following:
https://www.readycloud.com/api/v1/oauth2/authorize?scope=order%20account-read_only&response_type=token&client_id=c2f9a5f5137602d162a72befdddd70
Authorizing Your Application
Getting the API Key
If you created the above URL correctly, it should bring you to a page like this, assuming you are logged in at www.readycloud.com:
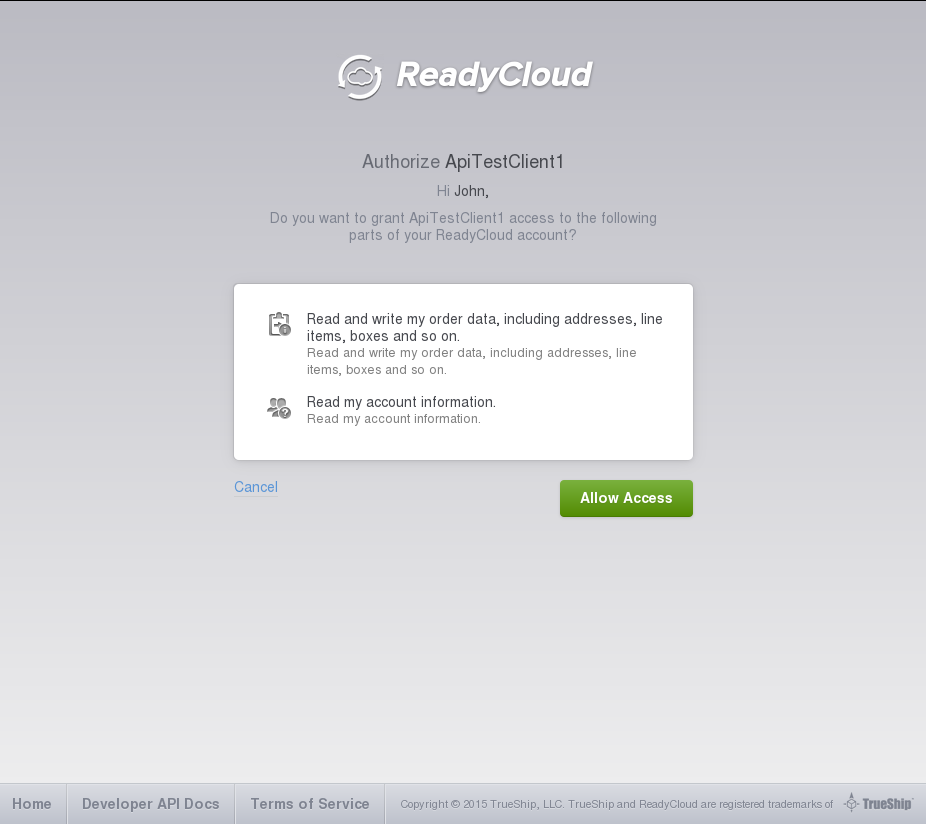
This is the screen that the user who clicked the URL you created will see. If they agree to allow your application to access the parts of their account you requested and click the “Allow” button, they will be shown a page with the API key on it. An example of the URL of the displayed page is:
https://www.readycloud.com/api/v1/oauth2/auth_code#access_token=4847c0ef271c3cf1afc3056e3cba166f&scope=order&expires_in=31536000&token_type=bearer
Instruct them to copy the key into your application. At that point, you will have to save that key somewhere in your application in order for it to access the APIs on ReadyCloud without needing to authenticate again.
Note: If you are writing a mobile application and you are in control of the web browser, you can automatically grab the key from the URL fragment. The API key in the URL above is the “access_token” fragment parameter.